Getting started with Variations
Load the program and drag an image file to the iconbar icon.
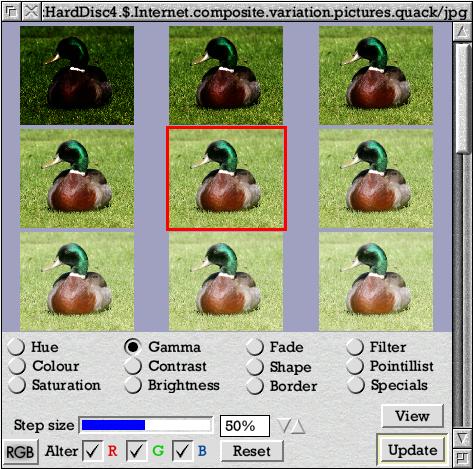
This window will open:
 Each small version of the image (called a variation thumbnail) is slightly different. You will notice that the image in the middle of the window is surrounded by a red box. This is initially a representation of the image as it is now. The others are all Variations of it.
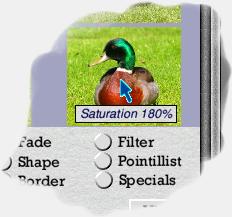
As you move the pointer over thumbnails a small window that floats beneath it will show details about the variation that each one represents.
For example, the bottom right thumbnail in the window is initially the image with Saturation set to 180%
 Clicking SELECT on a thumbnail moves it to the central position in the window.
Try it by clicking on Saturation 180% now.
Clicking SELECT on a thumbnail moves it to the central position in the window.
Try it by clicking on Saturation 180% now.
You will notice that the other thumbnails have changed too. In fact they've moved with it. The thumbnail formerly just to the left of Saturation 180% (which was depicting the image with Saturation at 160%) is still beside it - now it's just to the left of the centre thumbnail.
Other thumbnails representing saturations of greater than 180% are now visible in the lower right and our initial image (Saturation 100%) has been pushed to the extreme top left thumbnail in the window.
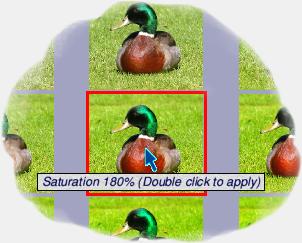
If you move the pointer over the centre thumbnail you will see that as well as displaying the variation (Saturation 180%) the small window also invites you to double click to apply this change to the full size image.
 As an alternative to double clicking you can instead click on the Update button at the bottom right of the window to apply the variation currently depicted by the central thumbnail to the full size image.
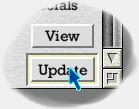 Clicking on the View button immediately above Update will open a full view on the image. You can do this at any time and will see the image change when you choose Update or double click on the centre thumbnail.
Below the variation thumbnails you will see a series of radio buttons, one of which (Saturation) is selected. This is the effect being used to generate variations on the image. Try clicking on Gamma instead. The variations thumbnails will change to show variations based on the Gamma effect:
 Click on one of these to move it to the centre thumbnail. Experiment with clicking to the left of and above the centre and to the right and below to get a feel for how the effect 'moves'. You will notice that the thumbnails closest to the centre are also closer to it in appearance. Clicking on them changes the centre thumbnail the least.
Experiment with some of the different effects available. If you see one you like simply click on it to move it to the centre thumbnail and then either double click on it there or choose Update to apply the change it represents to the full image.
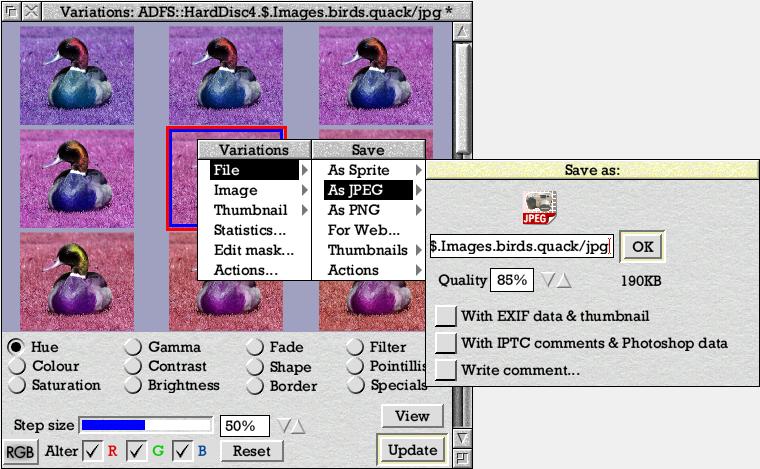
To save your modified image click MENU over either the variations thumbnails window or the full view window and run the pointer through the File -> menu item. Variations lets you save in a number of formats (here JPEG saving a hue shifted duck is depicted).